Wednesday, July 27, 2016

Salt Roasted Potatoes

Since Carol asked why restaurant potatoes taste so much better than ones cooked at home - I can tell you the secret is salt.  Restaurants rub the skins with oil or bacon grease then rub with salt (no wholes are poked into the potato) then baked.  But I found a way to make them without a ton of salt sticking to the skin.

Salt Roasted Potatoes.

I'd heard the concept and lumped it in there with Radiator Roasted Rump Roast and Steam Engine Steamed Salmon , But after reading of it on Cooks Illustrated  Oct. 11 website, which had a recipe for salt roasted potatoes with thyme and shallots, I had to try a Johnson household edition.

Most recipes just call for burying a baker under a mound of salt. The premise is there is a moisture exchange between the salt and the spud, the moisture escaping the potato being absorbed by the salt and then reabsorbed by the potato making the interior, not only well seasoned, but very light and fluffy. Store brand salt was 32 cents   The four potatoes were about 50 cents (two for dinner, two chopped and reheated for home fries in the morning)  The worse case  scenario if these turned out like mortar rounds was I was only out  out a buck and there was still pork tenderloin, salad and garlic cheese biscuits (knock off Red Lobster version). if needed.


You start by laying 4 potatoes in about 2 and a half cups of salt (one 26 ounch package) in a 13 x 9 pan.   To the salt was added a clove of garlic and some sprigs of rosemary instead of the thyme and shallots.  In hindsight, I would have left some of the paper surrounding the garlic on there, so it didn't fall apart, and was a little softer at the end of cooking.

Cover TIGHTLY with foil and bake in the middle rack of a 450 degree oven for 1  hour and 15 minutes.  When there's 30 minutes left to cook, pop in a 1 and 3/4 - 2 pound pork tenderloin which you have rubbed with garlic and herbs and laid in a small glass pan on top of a little EVOO and salt, then covered with foil.

When time is up, remove potatoes and pork.  The pork should be about medium rare,  Keep foil on it, set on a trivet and allow to finish cooking to medium with the foil on it.  Remove foil from potatoes and remove the garlic to a small dish while you raise the heat on the oven to 475 degrees (my oven tends to be "hot" so 475 worked better than the 500 degrees the web recipe called for)  Brush the tops of the potatoes with a Tablespoon or so of EVOO and return to oven for 15-22 minutes. 

While that finishes, squeeze the garlic bulbs gently (and carefully, they're hot) to remove the garlic pulp and mix with a big pinch of chopped fresh rosemary and 4 Tablespoons of butter and a dash of sea salt to make a paste.

The potato skin will be dark golden brown and firm, but when poked with a knife, the interior should be quite soft when done.  Remove any clumped salt from the bottom of the potato with a clean kitchen towel , and serve with the garlic herb butter. (The salt in the pan can be strained and reused for another batch of potatoes before discarding).

Seriously, this was the best baked potato I've ever had. The interior was incredibly soft and fluffy, with a hint of garlic and rosemary in it, even without the butter and  there was no  "salty" taste.  The skin was crisp but not shoe leather, making it easy to scoop out the well seasoned flesh with a spoon.

Inexpensive, easy and delicious, that's what home cooking is all about.

Saturday, July 23, 2016

Pad Se Ew

Pad Se Ew is a super easy and very tasty Thai stir fry.  If you don't have an Asian grocer for the Chinese broccoli, I've made this with regular broccoli and it's still excellent. 

It is typically made with Sen Yai, which are wide, thin fresh rice noodles you can find at an Asian grocery store.  But you can make them with dried rice noodles, just prepare according to package directions before adding to stir-fry.

The secret to wok cooking is the high heat.  You'll know it by the smell.  You simply can't make good stir-fried noodles without a well-seasoned wok and high heat.  It's impossible to do justice to this wonderfully fragrant dish justice with a non-stick pan.  That wonderfully toasty smell is the secret so don't be scared to work with it.  Don't let it get to the smoking point, if you do getting the hang of it, discard it.  Oil that reaches that heat is really not safe to consume in the long run.

Ingredients:

2 tablespoons high heat oil (canola, grapeseed, safflower, sesame, sunflower)
2 cloves garlic, minced
A cup of thawed veggie "chicken" pieces
10 oz fresh flat rice noodles
6 oz Chinese broccoli (kalian/gailan) or local broccoli


Sauce:
2 tablespoons soy sauce
1 tablespoon Red Boat fish sauce
1 Tablespoon oyster sauce
dash of crushed red pepper
drop of Scoville Brothers Heavy Metal Heat sauce (a robust pepper flavor)
1 Tablespoon honey

Instructions:

Slightly separate the fresh noodles so they are not sticking together.

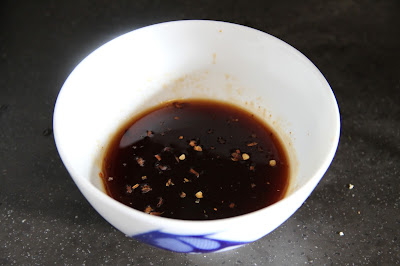
Mix the seasoning ingredients in a small bowl and set aside.

Add the oil and the garlic to the wok and turn heat to high.  Heating the garlic in the oil helps infuse it with flavor, a nice tip anytime you are working with garlic.  Add the "chicken" and broccoli and stir fry for about a minute (for bite-sized pieces).

 Add the seasoning sauce and stir until everything is combined and heated through and serve immediately. 

Pasta Pronto

Yes, that's a 75 year old gas stove. It's nice having something older than me in the kitchen.

One thing I do make on it fairly regularly is whole grain pasta (and occasionally the vegan or organic mac and cheese for a little guest).


Thanks to my friend Carol at
I discovered her trick to easy fuss-free pasta for two (I'm not sure if this would work in large amounts but for a serving for 2-3 it's perfect.)  Bring your water up to a full rolling boil, covered, pop the cover, pour the pasta in, give it a stir, and quickly cover it.

Then turn off the heat.

You heard me.  Turn off the heat, set the timer for 10 minutes and walk away.  Go do something you'd rather be doing.
Clean the garage  (I think I'll pass), pet the dog,. read your favorite blogs.

In 10 minutes you'll have perfect al dente pasta.

Now if I could just find a way to dry my hair every morning without the hair drier.

Wednesday, July 20, 2016

DIY Larabar

Most of you are familiar with Larabars - alongside the RX bar from Chicago, they are my favorite fruit/nut snack bar and come in all kinds of flavors. My favorite is the lemon.  I love anything lemon.

When I'm traveling I will always pick up a few in place of a candy or chip snack.  But at an average of $1.50 a bar, if you eat one every day (as I happily will) that $45 a month.  So I set out to make my own.

I will still purchase them, as there are some of their yummy flavors I probably could not duplicate and I love their little individual wrapped mini bars for my purse. But the lemon and key lime ones, are easy to do (simply sub  key lime for lemon in this recipe.)

Texture and  taste was spot on.  Even better - they were 1/3 of the cost!  No baking, and just a few cooking implements to wash up.  Here's a picture of a Larabar from the web (this is the Alt Lemon Pound Cake flavor)
Here is my DIY version before cutting.

DIY  "Larabar Style" Lemon Bar (note - my first batch were a little thin for my taste so I increased each of the ingredients by 50% and got just the right thickness of bar - recipe below is the adjusted one).

In a food processor pulse:

1 cup plus 2 Tablespoons salted cashews
3/4 cup plain almonds

until you have big crumbly bits.

Add:

1 8 ounce package pitted dates
3 Tablespoons plus 1 and 1/2 teaspoons lemon juice
some grated lemon zest (a generous half teaspoon)
a drop of Vanilla extract.

Pulse until you have a thick crunchy dough.  You will have to stop and redistribute the mixture with a wooden spoon 3 or 4 times as it's pretty thick and will bunch up on one side of the food processor making the blade ineffective.

Pat down into a 8 x 8 pan sprayed with non stick spray.  Refrigerate a couple of hours, then cut into squares.  I simply cut into squares, lifted them out with a spatula and then just smoothed the tops with a rolling pin (as I got lazy patting them out in the pan.)

Store in a Tupperware using wax paper to separate the layers of stacked bars or in individual snack plastic zip bags.

Tuesday, July 19, 2016

Advice for the Day

Note to self - don't go all afternoon without a healthy snack - you'll scarf up ANYTHING.

Monday, July 18, 2016

Herdsman Chili

Chili tends to be a dish most people make in winter - but I like to make a pot in the summer on the weekend.  (and yes, I have enough friend in Texas to know it's technically considered chili with beans but I'm an author, I'm going to write it my way :-)

It's a way to crock pot cook so I don't have to heat the oven and leftovers are great on a baked potato or a piece of cornbread with a big salad or in a Tupperware with chopped raw vegetables and some fruit for dessert for a tote-able lunch to work during the following week.


2  pounds veggie "beef" crumbles
1 sweet onion chopped
4 teaspoons minced garlic
1 bell pepper finely chopped
1 cup carrots julienned then chopped  (I use my "zoodle" tool from Amazon)
1/2 - 1 cup celery (whatever you have on hand)
1 jalapeno, de-seeded and chopped
can of tomato sauce
1 28 ounce can crushed tomatoes (I LOVE Muir Glenn fire-roasted organic)
2 teaspoons honey
1 teaspoon molasses
1 can black beans drained
1 can kidney beans drained
2 Tablespoons Penzey's Chili 9000 (or your favorite chili powder)
1 Tablespoon oregano
1 Tablespoon basil
1 Tablespoon Cumin
dash of Scoville Brothers Singing Smoke hot sauce (or your favorite)
1/2 teaspoon crushed red pepper (use a pinch if you want it milder)

Saute onion and garlic (if using) in a pan over medium heat. Add with your protein to slow cooker with remaining ingredients.  Cover and cook on low 6-8 hours.

Top with tortilla strips, veggie sour cream substitute, and non-dairy cheese.

Note:  I've also made this and used just black beans, replacing the celery with finely chopped sweet potato. and substituted a small shot of tequila for the honey and molasses - YUMMY!

Sunday, July 17, 2016

That's How We Roll - Simple Thai Meal

Lunch was an outing with friends that my husband went to college with. With two kids under the age of three - we went to them so they didn't have to get the kids rounded up in the car, and they just ordered pizza to be delivered that we could enjoy as the kids (who ate earlier) were down for a nap. The pizza was excellent but after having three pieces I didn't want a heavy dinner.

It's a good night for Thai Summer Rolls (sometimes called Spring Rolls). Unlike the fried rolls that are made with a wheat wrapper these are made out of rice paper (found in the non refrigerated oriental section at larger grocers). You can dress these up with cut veggies such as colorful peppers as a topping, but I was going to simple and quick, so I just filled up the rice wrappers rolled, and dinner was on the table.
One of the cutting implements to make "zoodles" works great on the carrots.

It doesn't get easier. Simply chop up some salad materials and whip up a sauce to dip them in. It can be as simple as some Red Boat Fish sauce mixed with  a little honey and the juice of a couple limes or this more complex sauce (garlic optional) which was really good.

To make the rolls, place the sheets of rice paper (which are like paper thin hard Frisbees) in a dish of warm water for about 30-40 seconds.

.

Place on clean, dry towel, put a bit of veggies (I did mint, lettuce, carrots, and cucumbers but you can add sprouts, bits of tofu, fresh basil, cellophane noodles - be creative!) Then you roll one end over the filling, tucking it in, then fold the sides towards the center and roll up. If you are making several get a fresh kitchen towel about halfway through so they don't stick to a damp towel. There's a number of online tutorials that show how to roll them up. The rice papers range from 20-34 calories each, so you can eat several, filled with healthy choices, and have a meal for under 300 calories.

An easy, fun and healthy cold supper or appetizer, great on a warm summer day.

Sweet and Spicy Dipping Sauce

(serves 2-4)

1/4 cup unseasoned rice vinegar
2 Tablespoons low sodium soy sauce
2 Tablespoons warm water
1 clove garlic minced (optional)
1/4 teaspoon crushed red pepper
2 drops of Scoville Brothers Rockin Red hot sauce (or to taste)
2 Tablespoons honey
juice of one lime

Stir - let set a few minutes to blend flavors and service in individuals serving cups.

Saturday, July 16, 2016

No Dairy/No Egg Eikhorn Sourdough Muffins

These were an experiment, not from any particular recipe, and turned out really good. The outside was nicely crisp, but not hard, and the interior was soft and moist,  wonderfully textured with a light, sweet taste.  Made with vegetable or coconut oil, no dairy, and no egg these are perfect for your vegetarian or vegan friends and with just Einkorn flour, they are very, very low in Einkorn's unique gluten which those who are only gluten sensitive (not Celiac) can likely enjoy.

I baked mine for 25 minutes which was a bit much, as noted by the browning (though they were still really tasty).  I adjusted the cooking time below for you, and that should be perfect.

In addition to the probiotics in the sourdough and the overall increased nutrition of the Einkorn flour over traditional flour, these are a very filling and satisfying muffin to start your day with or have alongside a savory vegetable soup or stew.  If you don't have a sourdough starter add 3/4 cup extra flour and 1/4 extra liquid in its place, but seriously try making some sourdough starter, I use mine 3-4 times a week and since switching over to Einkorn and less commercial yeast, I have ZERO of the tummy issues I used to regularly have.
 EACH muffin contains roughly:
170 calories
6 grams of protein
3 grams of fat
3 grams of fiber

Sourdough Eikhorn Muffins (no egg/no dairy)

2 cups Einkorn flour
1 cup wild yeast sourdough starter (fed with Einkorn)
3/4 tsp salt
1 teaspoon baking soda
1 and 1/4 teaspoon cinnamon
pinch of cardamom
1/2 cup sweetener (I filled up half-cup measure two-thirds with honey and the rest with maple syrup - use all maple syrup for Vegan).
1/4 cup nut milk
2 Tablespoons vegetable or coconut oil (melted)
2 Tablespoons whole flax seed divided
3 Tablespoons warm water

Put 1 tablespoon of the flax seeds in a blender or food processor and pulse until you have ground flaxseeds, add warm water, set aside for 5 minutes. It gels up during this time.   This is your egg substitute and works great in all quick bread. The remaining seeds go into the muffins whole.

Mix all dry ingredients in a big bowl, adding the remaining Tablespoon of flax seeds that were left alone.

With a hand mixer in a small bowl mix flax liquid with sweetener on medium for one minute and high for four minutes until thick and creamy.

Combine wet and dry ingredients by hand (it's a thick batter)  Spoon into 10-12 greased muffin cups (I used 10 to make them a little bigger).  Let rest 20-30 minutes then bake for 18-22 minutes at 400 F.

Wednesday, July 13, 2016

Gluten and Corn-free Cornbread

I love the taste and mouthfeel of buttery cornbread, but corn is a grain, so for a friend with a sensitivity to corn and gluten I came up with this recipe and it was a huge hit. It took a couple of tries to get it right as I I tinkered with some grain-free flours, trying to get something that resembled cornbread in mouthfeel and texture with a buttery taste like good cornbread.  I made a couple big batches of this, took it to work for a few to sample, and there was nothing left but crumbs and I was asked to write the recipe out on about a  dozen slips of paper on my lunch break (some just liked it, some have family members with Celiac). Plain or served with some honey, it's a treat and pairs of so nicely with soups and stews.
click to enlarge picture

No, it doesn't taste exactly like cornbread, but if you are simply out of cornmeal or are avoiding all grains it's a tasty substitute.  It's extremely moist and tender with a wonderful buttery flavor. Don't let making Ghee scare you away, it's not hard.  Ghee is basically clarified butter that is cooked a bit longer until the clarified butter is golden and the milk solids at the bottom are toasted, (watch it doesn't burn).   In addition to having a high smoke point which makes it a great replacement for vegetable oils, without the lactose and casein, its' easy to digest for those who can't do dairy and it adds a nutty depth of flavor that's good on so many things (like roasted sweet potatoes).

There is a a recipe/step-by-step tutorial for ghee over here

Gluten Free "Corn" bread

1/2 cup plus 2 Tablespoons Almond Flour
1/4 cup plus 2 Tablespoons Coconut Flour (I used Bob's Red Mill, slightly larger grind which is great for this recipe)
1/2 tsp. salt
1/2 tsp. baking soda
3 large eggs
2 Tablespoons Honey
1/2 cup vanilla almond milk
1/4 cup  Ghee (made with a good quality, grass-fed butter) nuked for about 20 seconds to warm it up for blending.
Preheat the oven to 325 F. Mix dry ingredients in one medium sized bowl, wet ingredients in another, smaller bowl.  Combine and stir until mixed (mixture will be quite thick).  Place in a pan lined with parchment paper or sprayed with olive oil based non-stick spray and spread mixture in pan (use a knife to smooth the top).

Bake 25 minutes or until a toothpick inserted into the center comes out clean.

Saturday, July 9, 2016

The Devil Made Me Do It


The little  solar powered devil with the forks in his hand was something my only brother always had in the window.  After a debilitating motorcycle accident some 10+ years ago that had him in and out of the hospital for a year, trying to fix a crushed leg, he gained 70 pound and developed type 2 diabetes. With stubbornness and willpower he lost most of the weight, but we always laughed at the little devil as the sunlight makes him raise his little arms (with the forks) up and down as he bobs his head.- tempting us to have something fattening in the kitchen. Silly - but it makes me smile remembering my brother.

I thought it had disappeared after he died suddenly, figuring his daughter took it as a keepsake, but I found it at Dad's tucked away in a cupboard and it's now on MY kitchen windowsill.

We had a fairly big breakfast so when my husband, otherwise known as "Partner in Grime" asked for Thai food for dinner, I was game, I made half with chicken for him, and half with Gardein veggie "chicken" for me.
There's an excellent tiny Thai place within short driving distance, but you never now how much sugar and oil is used, and dinner for two with a drink is usually $30 though it is where we go for monthly "date night" as it's such a small elegant little place.

So I'm working on making my own, adding the spices and sauces to my cabinets a bit of the time and keeping both sugar and oil to low levels..  Tonight  I made Thai Ginger Chicken (Gai Pad Khing) and it was incredible and also very filling for a small portion with the protein from the chicken..  I also loved  it with the" buy one get one free" chicken tenders and some garden veggies and bulk rice the whole meal was about $3 and there is enough leftovers for several more servings.
I made a run to our local small "ma and pa grocery" which has some pretty good deals for being locally owned (most of us prefer to avoid the little hell on earth that is Jewel Osco on a Saturday Morning after driving further into the city).

It was easy - mixing up the 4 ingredient sauce and chopping up some veggies and fresh grated ginger, then cutting some chicken tenders into bite sized pieces.  Don't turn up your noise at "fish sauce" and "oyster sauce"  I HATE oysters and am not a fan of fish (unless sufficiently battered and deep fried and served with beer) and this doesn't taste "fishy" just rich and complex.
I got the rice started.  This Oster steamer gets used a LOT at my house - There's a second layer to it and when it's hot  and you don't want to turn on the oven I've cooked an entire meal (including tenderloin in here). Plus, rice cooked in here is always perfect, unlike my cooking rice on the stove which is like playing "grain lottery".
Gai Pad Khing

Serves 4

2 Tablespoons  plus 1 teaspoon fish sauce (use Red Boat brand, available on Amazon, trust me on this).
1 Tablespoon plus 1/2 teaspoon oyster sauce (available in most oriental sections at the grocers).
2 teaspoons sugar or honey
1/8 teaspoon crushed red pepper
2 Tablespoons high heat oil (not olive).
1 and 1/2 pounds chicken breast cut into bite sized pieces (or tofu or vegetarian substitute)
2 teaspoons minced garlic
1 large red bell pepper, thinly sliced
1/2 large sweet onion thinly closed.
2  heaping Tablespoons FRESH ginger, pealed and cut into matchstick size pieces (available in the veggie section, it looks like a small light colored gnarled root).

Mix sauces sugar/honey and crushed pepper in a small bowl and set aside.
Heat a wok or large skillet on high heat until hot. I did two batches, the first one meat free). Add oil and swirl around the pan.  Add garlic and lightly soften until fragrant and golden.  Add the chicken or veggie substitute a bit at a time, cooking in batches until it's about 90% cooked through.  Drain off most of the extra liquid and add a teaspoon of oil to the pan.  Add chicken and the veggies and stir fry until the veggies are tender crisp.  Turn off heat and add sauce (you can thicken with a bit of corn starch but I like mine liquidy to pour over the rice).

Serve with rice or salad.

Monday, July 4, 2016

There's Always Time for a Smoothie!

I have to work to add more fruits and veggies to my diet, as I don't eat them as much as I should. One way I WILL readily eat them is in smoothies.  With enough protein -  a smoothie is a great, refreshing and filling meal replacement. This is one of my favorites.  You don't taste the leafy greens but they add a punch of nutrition.  This kale was fresh out of the garden.
In a blender place:
1/3 of a block of firm tofu (yes, this adds protein and gives it a satisfying milkshake like texture).
1 cup of blackberries
a drop of honey (optional)
1 cup fresh kale (or other dark leafy green)
3/4 of a  12 oz. can of sparkling mineral water
1/2 scoop  Berry flavored veggie protein powder

Blend longer than just to mix - the more air that is incorporated into the drink - the more volume you will have to keep you full longer.
The smoothie is only 250 calories, with 9 grams of fiber and 20 grams of protein so you can add a sourdough corn muffin along with it for a quick meal on the go that will keep you full for hours.

Wild Yeast Sourdough Honey Corn Muffins 

1 cup Azure Standard wild yeast sourdough starter
1/4 cup  whole wheat flour
1 cup Bob's Red Mill cornmeal
1 Tablespoon baking powder
1 teaspoon salt
1/4 cup sugar
1/4 cup  plus 1 Tablespoon honey
3/4 cup low fat milk or nut milk
4 Tablespoons of melted butter
2 eggs

Mix dry and wet ingredients in separate bowls, adding the melted butter in a thin stream, whisking constantly.

Combine wet and dry and place in 12 count greased muffin tins (these don't rise much so the tins should be fairly full).

Bake at 400 F. for 15-17 minutes (until a toothpick inserted in center comes out with just moist crumbs or dry).

Azure is GREAT to do business with and delivers all over the country. For starter ordering info cut and paste this in your browser:   https://www.azurestandard.com/

Sunday, July 3, 2016

Talking Turkey - More Meat Free Meal Ideas

Today started with vegan French toast made with leftover sourdough English muffin bread (recipe in an earlier post)


1 heaping Tbsp chia seeds (whole or ground into a fine meal so they're undetectable)
1/2 Tbsp agave nectar or maple syrup (or sub honey if not vegan)
1 cup unsweetened almond milk (or any non-dairy milk)
1/2 tsp ground cinnamon
1/2 tsp vanilla extract
4-5 slices bread (it's important to use a sturdy, rustic bread or it can turn out soggy/soft)

Mix and put in your refrigerator and let sit 15-20 minutes so the chia seeds can gel up for a nice batter.  Dip your bread lightly in the mixture and cook in your cast iron pan.


Lunch was Gardein brand turk'y cutlets -  a new product in their line. With that was some wonderful kale my personal trainer Birgit brought over from her garden Thursday, served with a vinaigrette, with rice, hummus and some mutant carrots (note to husband, please buy BIG carrots :-)

The "gravy" included with the cutlets was a bit lumpy though it had a nice taste so next time I think I'll just top with a squeeze of lemon.  The cutlets were amazing and tasted just like turkey. They are NOT gluten free but they have WAY less artificial ingredients than other faux "meats" on the market. Gardein products are, by far, are still my favorite vegetarian meat substitutes and they are reasonably priced.
Snacks were an apple and later some popcorn to which I added a Tablespoon of Nutritional Yeast right after cooking, shaking with the pan cover on so the powder sticks. It gives the popcorn a nice almost nutty/cheesy taste while adding B vitamins, protein, and fiber. My husband tried it and said it was really tasty as well.
Dinner - was "flying Frisbee's"", which is what we call tostados in our house. Leftover corn tortillas were heated in the cast pan until slightly crispy, then covered in non-fat refried beans, cumin/oregano/chili powder, Scoville Brothers cowboy crooner hot sauce infused TVP, and topped with some vegan cheddar, finely grated, lettuce and some yummy peach/mango salsa.